Online Free Hosting Guide
Creating User Account
Applicant Login Page:
This is the homepage for applicants (before login). User can use the general services shown without registering in the system. For using rest of the services applicant has to create an account.
Steps:
• click on the browser.
• Enter the URL in the address bar as www.register.com.np for active domain.
• Enter the URL in the address bar as www.GitHub.com for online hosting.
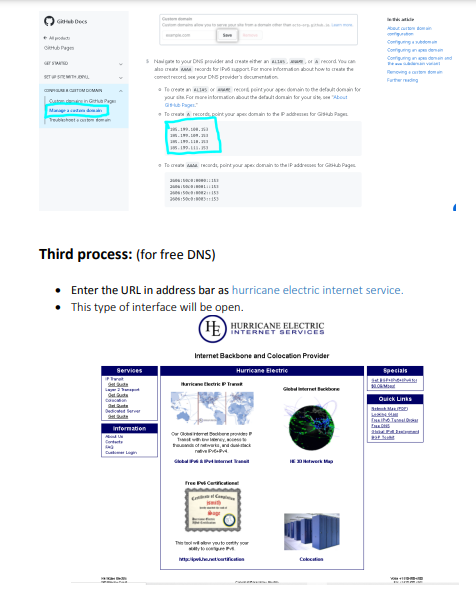
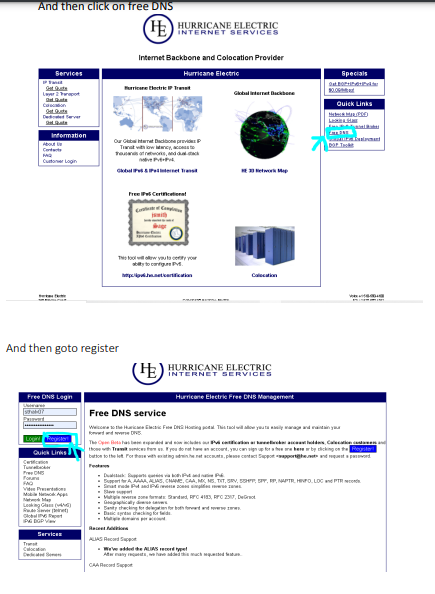
• Enter the URL in the address bar as hurricane electric internet service for free DNS.
Note : Above URL are used for online hosting.
First process: (for domain registration )
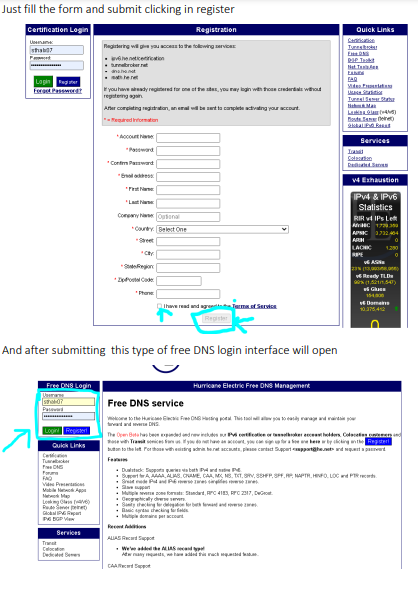
• Enter the URL in the address bar as www.register.com.np and Click on the online application button appearing in the home page. System will open the www.register.com.np for applicants. This type of interface will open.
• Click on user login and create your own domain account.
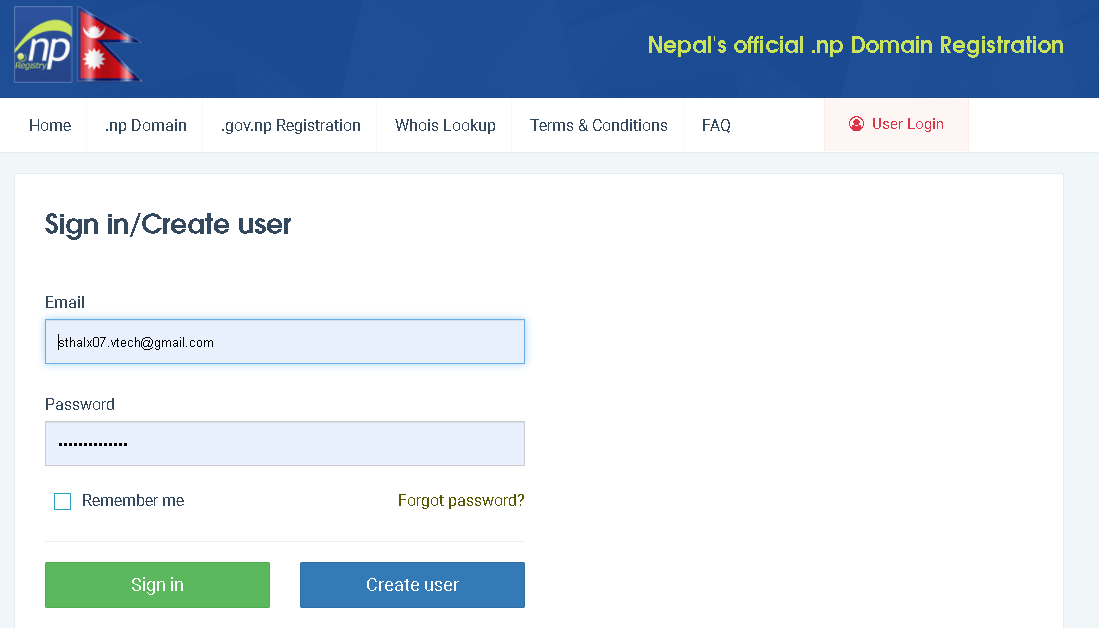
• After creating your account just sign in your account, this type of interface will shown in screen.
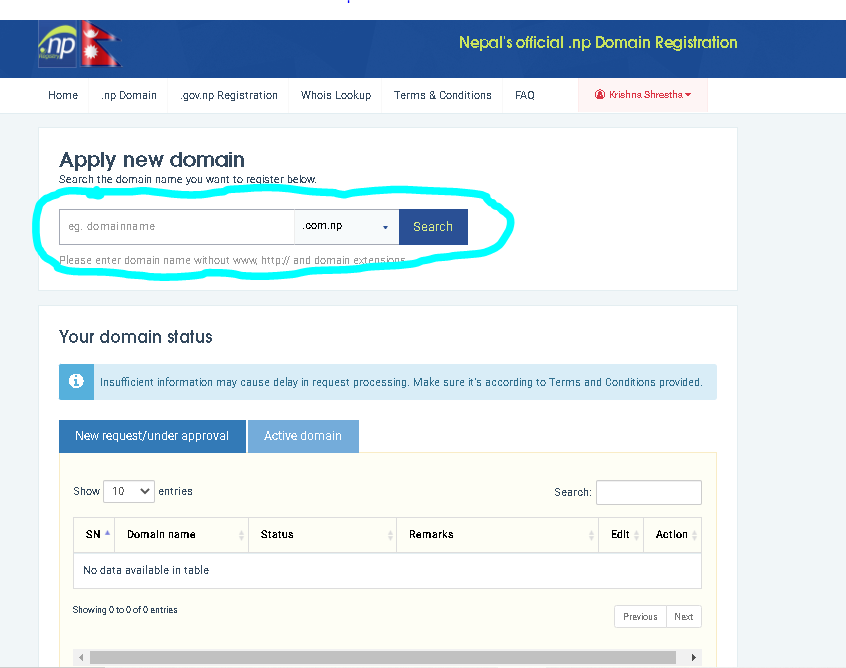
• Just click on indicated part and choose/put your own id similar to name. (eg: krish-stha .com.np) and click on register.
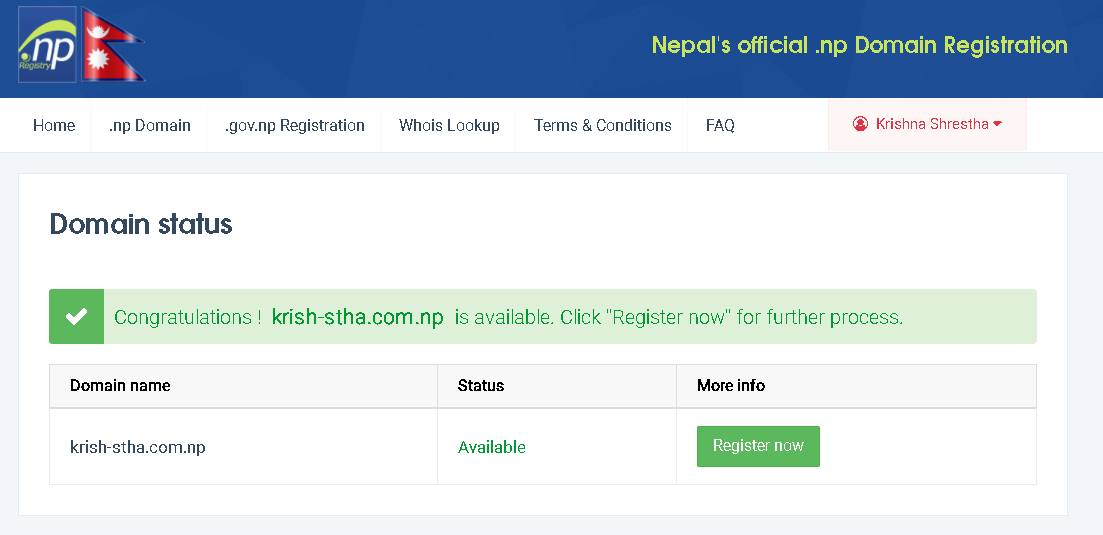
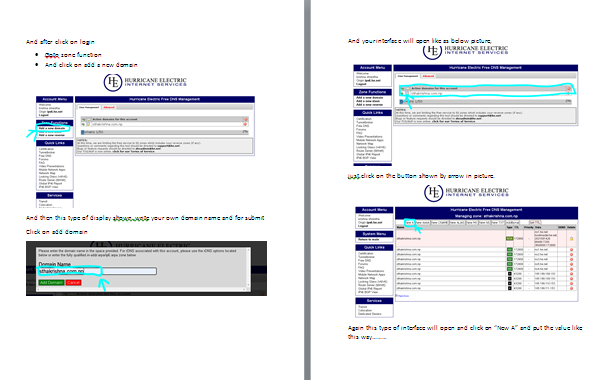
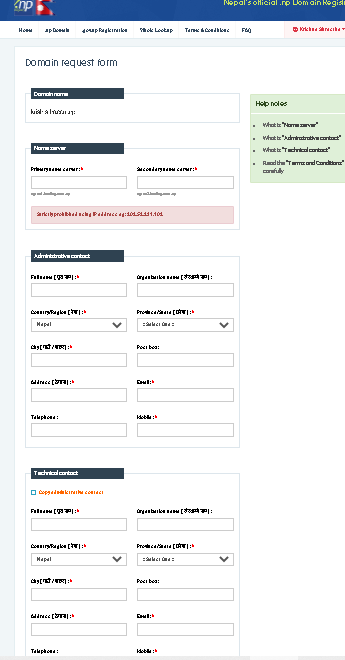
• After clicking on register, domain request form will be open as
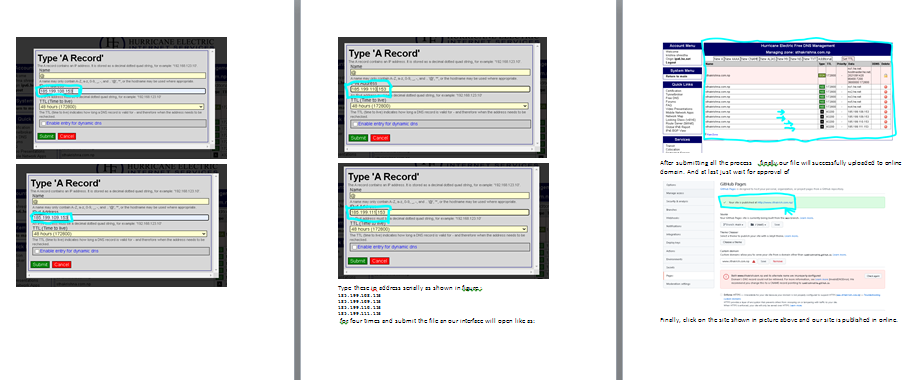
• Fill all the form as required and submit/save. (note : put value in primary name server: ns1.he.net and in secondary name server: ns2.he.net).
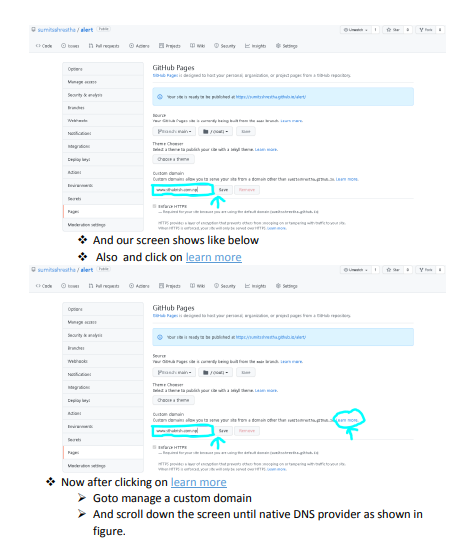
After submitting form, click on Active domain you can see your new domain name, here you can edit your information, DNS, even you can view your profile detail.
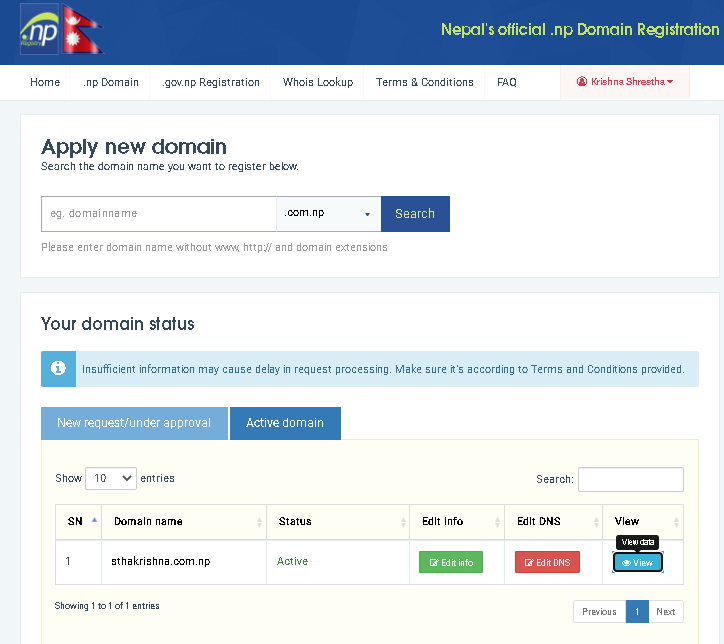
Finally our new domain name created.
(Note: Approval may take couple of hours/days But .com domain you can easyly change custom dns )
Second process: (for GitHub online hosting)
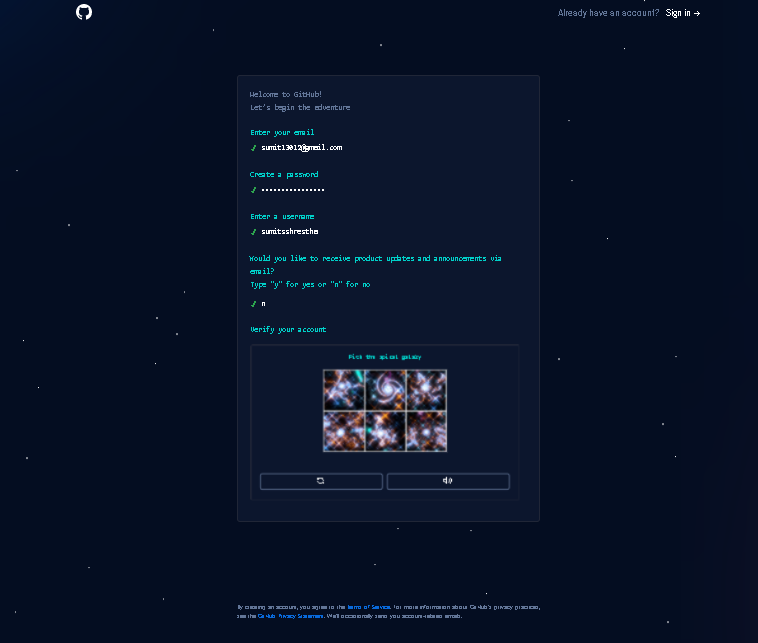
• Enter the URL address bar as www.github.com this interface will open.

• Click on sign up button and create your github account, including your gmail account and submit. After that verify code which was send to your gmail account.
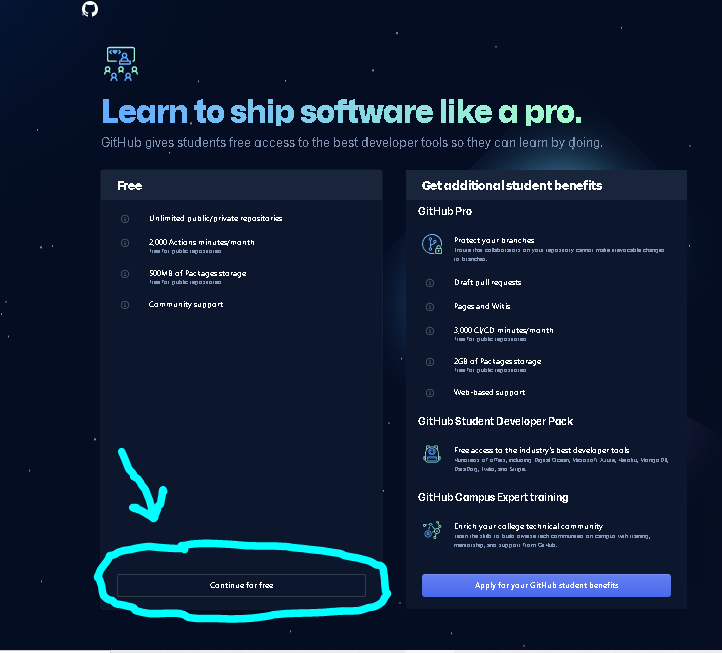
After all the process done click on free, finally your github account created.
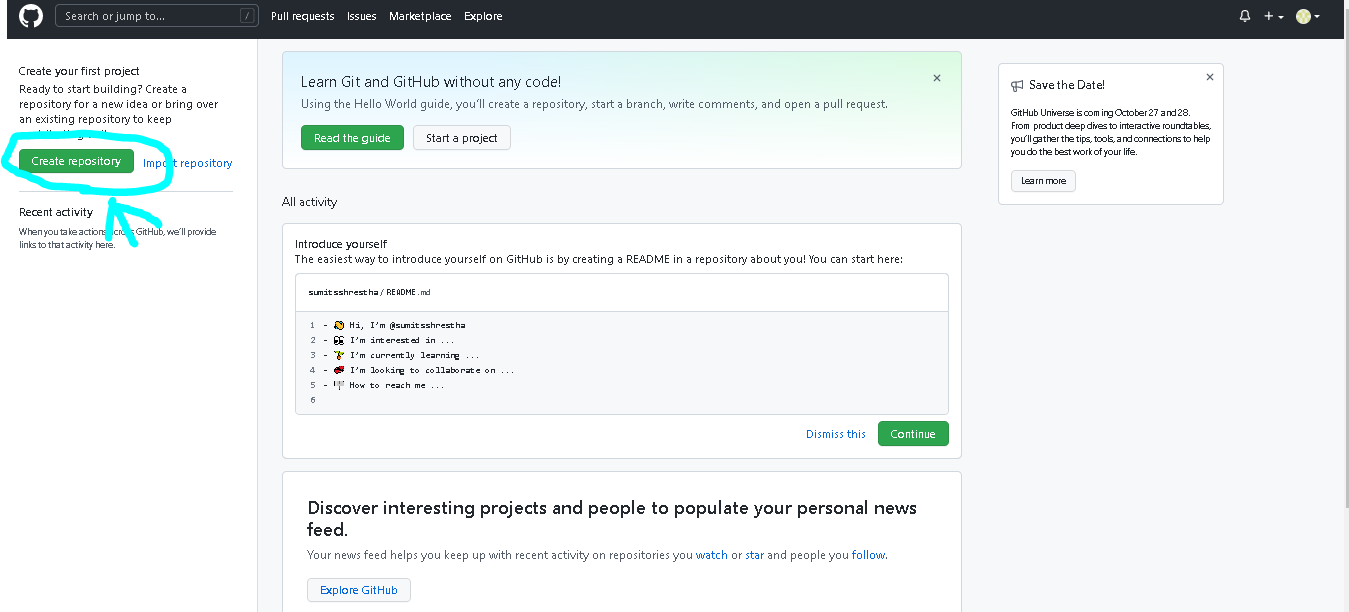
Our interface will show like this and click on create repository
After creating a new repository, you can write/ select your own repository name and click create repository for submit. (other details are optional)
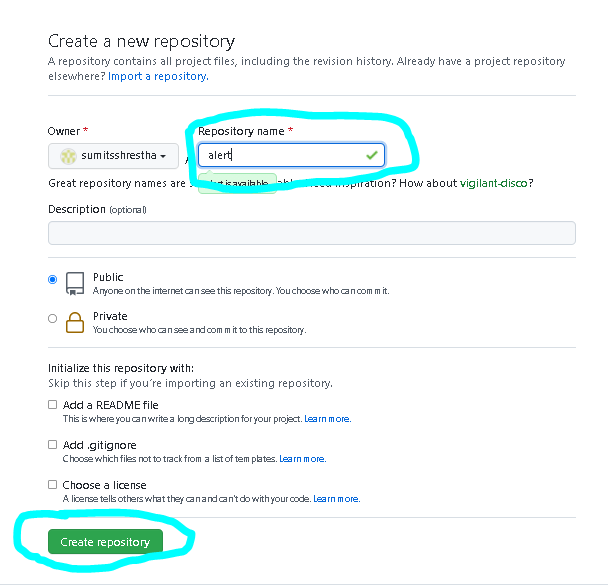
Our screen shows like
Now if we have file we can upload our file otherwise choose create new file.
(Note suggest: I prefer to upload files)
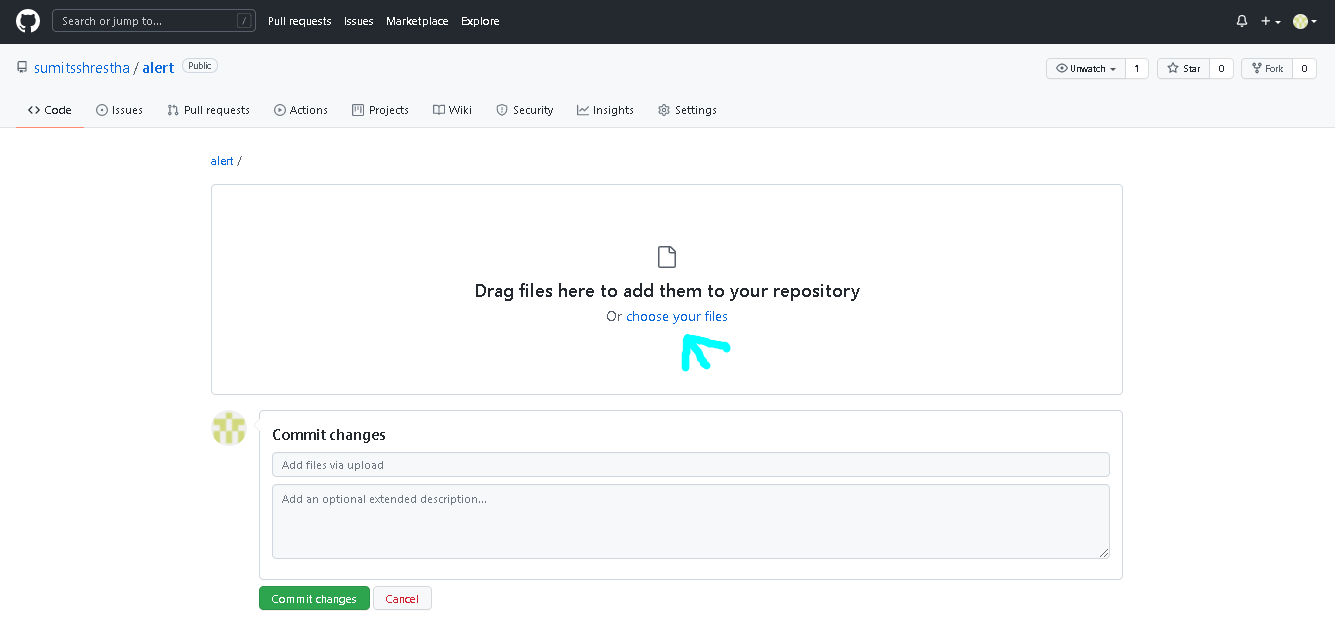
Upload your files and click on commit changes.
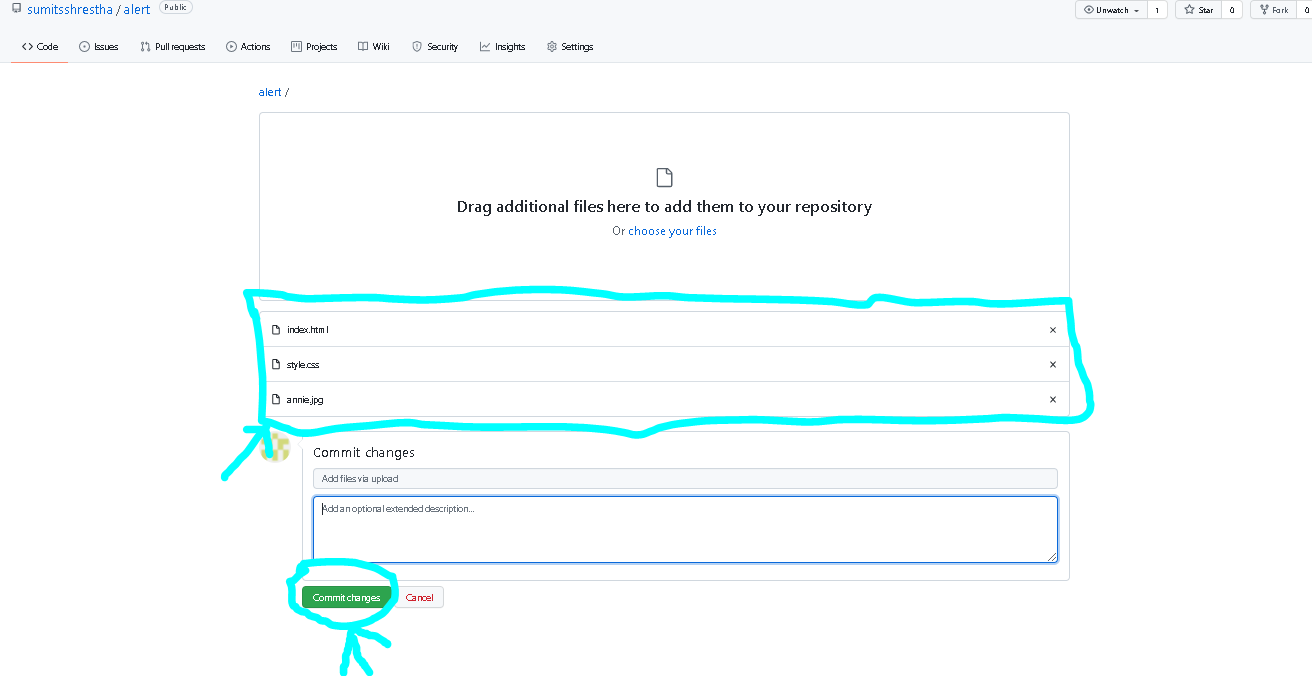
After submitting (commit changes ) , goto add files and and click on create new file for “Cname file”.
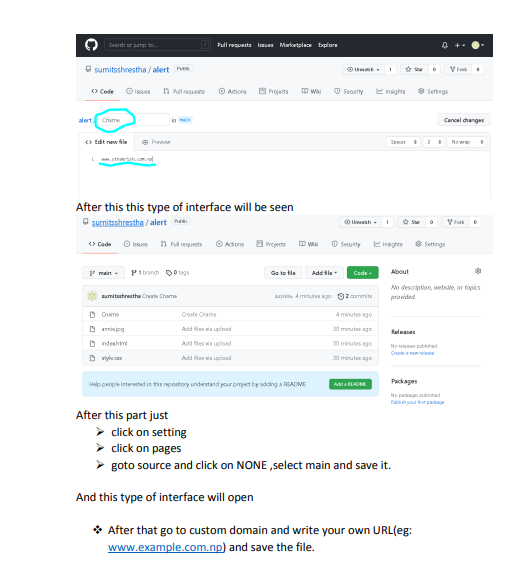
Creating cname file
Be careful on this step that as shown in figure below :
Write cname as in figure ,just put your own URL which was created before (eg: www.example.com.np)
And scroll down for commit changes / submit.